Showing posts with label cooking. Show all posts

Tuesday, June 4, 2013

Doughnut Muffins

Yeah, you heard me.

Doughnut Muffins.

And they are good too.

I grew up on freshly made doughnuts.  My Dad would pull out the Fry Daddy, mix up a batch of Hazel's Donuts, and fry up some hot, fresh, melt-in-your-mouth deliciousness.  Hazel was a family friend of ours and I am not about to give up her donut recipe.  My Gramma would invite us kids over, set us up on the screened in porch and deliver hot, fresh, deep-fried baking powder donuts, which we would immediately slather with orange flavored cream cheese frosting (which melted into ooey goodness all over our fingers, hands, and faces- hence the reason we ate them outside on the porch).  We would eat until we had to lay next to our bellies groaning with agony and delight.  They were that good. 

When I came across a doughnut muffin recipe at King Arthur Flour, I thought- yeah, right.  It can't possibly be as good as the real thing.  And I was right!  It was a little bland.  (HA- sorry King Arthur!)  Lucky for you though, I am willing to dink around with my recipes until they are just perfect and this one finally hit it's perfection level last week.  The sad part is that I have almost no pictures of the process because I didn't know it was going to turn out so well.

Still dubious about them?  My son ate 3 in one sitting (unheard of), and rather than tossing stale muffins to the chickens 3 days later- there were none to be found.  NONE.  They were gone- toasted, buttered, and devoured. 

Before you start, you should know that this is not your average muffin batter.  It is thick, it requires a good beating, and it's more cakey than muffiny. 

The one and only (crummy) photo of my successful muffins.  (AHAHA- see what I did there?)


DOUGHNUT MUFFINS

Batter:

  • 1/4 cup butter
  • 1/4 cup COCONUT oil  (Yes, it must be coconut oil- it gives them an amazing flavor- it doesn't taste like coconut though, so don't worry if you hate coconut.  It just adds a nice depth to them.)
  • 1/2 cup granulated sugar
  • 1/3 cup brown sugar
  • 2 large eggs
  • 1 1/2 teaspoons baking powder  (I use Rumford or Trader Joe's Baking Powder.)
  • 1/4 teaspoon baking soda
  • 1 1/4 teaspoons ground nutmeg (I tend to add a little more)
  • 1 teaspoon ground cinnamon
  • 3/4 teaspoon salt
  • 1 teaspoon vanilla extract
  • 2 2/3 cups unbleached all purpose flour
  • 1 cup milk
Topping:

  •  1 1/4 cups All-purpose flour
  • 1/2 cup brown sugar, firmly packed
  • 1/4 teaspoon salt
  • 3/4 teaspoon cinnamon
  • 1/2 cup (1 stick, 4 ounces) butter, melted
  • 1 teaspoon vanilla extract


1) Preheat the oven to 425°F. Lightly grease a standard muffin tin. Or line with 12 paper or silicone muffin cups, and grease the cups with non-stick vegetable oil spray; this will ensure that they peel off the muffins nicely. 

2) In a medium-sized mixing bowl, cream together the butter, coconut oil, and sugars till smooth.

3) Add the eggs, beating to combine.

4) Stir in the baking powder, baking soda, nutmeg, cinnamon, salt, and vanilla. 

5) Stir the flour into the butter mixture alternately with the milk, beginning and ending with the flour and making sure everything is thoroughly combined. 

6) Spoon the batter evenly into the prepared pan, filling the cups nearly full. 

7) Make topping by combing all the ingredients and mashing and mixing with a fork.  It will start to clump up a little (that's good- those are the tasty crumbs!)

Sprinkle the tops generously with the topping, patting it ever so slightly to ensure that it sticks.

8) Bake the muffins for 15 to 17 minutes, or until they're a pale golden brown and a cake tester inserted into the middle of one of the center muffins comes out clean.  (I've had them bake as long as 20 minutes, depending on the weather, etc.)

9)  EAT!  NOM NOM NOM................this recipe makes about 12 regular size muffins.  You can also make them in one of those doughnut pans they sell, but I've never had much luck with that.  


Tuesday, May 28, 2013

"Vegetarians can't grill..........."

.......or so they say..........

No, really- they do.  It's summertime- I talk about how much I love to grill.  Most people who actually know me are a little ........whaaa???.........you?  grill?........but aren't you mostly vegetarian?  What can you possibly GRILL?!  Grills are for MEAT!  Grills are for MEN!  ((insert man grunts))

Um....no.  My ex-husband actually set the grill on fire and made the worst hamburgers EVERY single time he started the grill. (*snickers*)

I'm a bit more gifted with the flames of wonder and might.

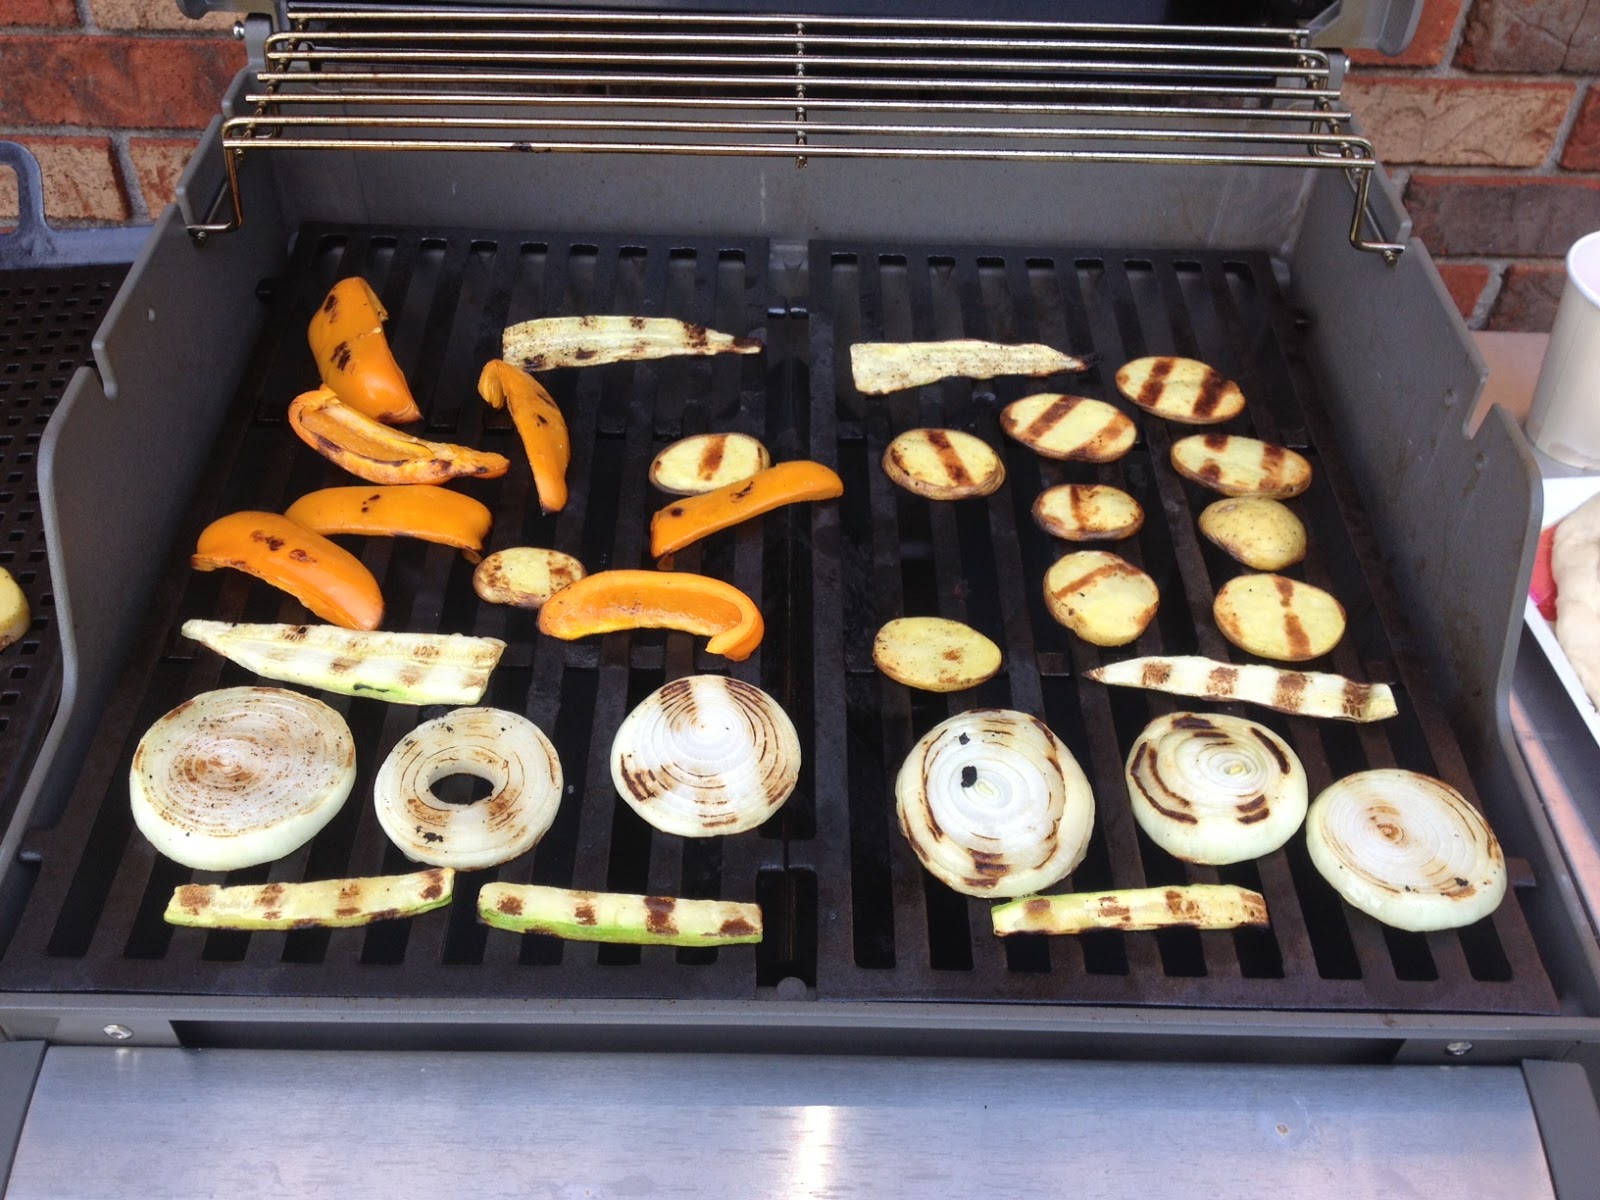
And I do it with veggies.


RAAAAH!

But seriously.........it's easy.  Vidalia sweet onions, peppers, potatoes, tomatoes, zucchini......whatever you have on hand.  I toss it in olive oil, sprinkle it with a little salt, a little pepper, maybe a dash of cajun seasoning for a little kick and toss it on a hot grill.   Be careful- the potatoes will try to fall between the slats of the grill. 


SHAZAM!!


And then........I drizzle it with some Balsamic Vinegar Reduction.  It's like a magic potion.  It's easy.  Take about a cup of balsamic vinegar, pour it into a saucepan and bring it to a low boil- add about 1 tsp of sugar (raw if you have it) and let it simmer until it reduces by about half.  It's so good- you've got to make some.  You will be drizzling it on salad, raw veggies, grilled veggies, pizza, bread.....pretty much anything.


But wait.......I also make the bread on the grill.  Yeah- grilled bread.  Trust me. 


You make a pretty basic ball of dough, divide it, flatten it, cover it with olive oil and grill it.............


Oooooooo........yeah.

Take 1/2 tsp of Active Dry yeast and add it to 1/2 cup of really warm water- mix it in until it dissolves and let it sit for 5 minutes.

Now......add 1 Tablespoon of olive oil, 1 tsp of salt, and 1 1/3 cups of flour.  Mix it up into a dough ball and knead on a floured surface for about 2 minutes.  Let it rise for 30 minutes.  (Turn on the grill- let it get hot- grill veggies- by then, you will be ready for the bread.)

Take your dough ball and divide it into 4 hunks and flatten them out into discs (or roll them out- your choice).  They will look like little naked pizzas.  Brush them with olive oil and toss them on the hot grill.  See what they look like in the picture above?  Yup- that's the goal.  It doesn't take long.  Maybe 3-5 minutes per side, depending on how well done you like your bread.  Be sure to shut the lid and hold all the heat in to bake them.  Be sure to brush them with olive oil before you flip them.  You can also sprinkle them with Italian seasoning, or whatever you like.  (Again- they are good with a little balsamic reduction........)

There you go- how to be a Bad Mother Griller......without meat (or any animal anything.)

Yeah- I don't post often enough, but when I do- it's totally worth it.  :)


Thursday, April 11, 2013

Hippie Runner Granola

Granola.  Gotta love it, right?

But not the store bought kind.  They put stuff in there.  Preservatives and junk, you know?

Blech.

Let me tell you about homemade granola and how easy it is.  My Gramma always made us homemade granola bars.  I like to make homemade loose granola cereal.  I do a cinnamon chocolate pecan almond granola.  That's what I'm about to show you how to make.  BUT, it is really simple to play around with this recipe.  I did- that's how I came up with this variation.  I looked on Pinterest for granola recipes, tried one, and then dinked with it until I created my perfect granola.  (Which is absolutely delicious mixed in with some vanilla yogurt!)

My *very* official recipe  (Vegans can substitute coconut oil for the butter!)


Here's my very secret and official recipe.  Intense, right?  First things first- gather your stuff!!


The line up.
I'm not fancy, as you can see by my containers.  I use local raw honey.  The bag in the middle contains the raw pecans that I picked up at Kroger.  The bag on the right has Trader Joe's Cinnamon Almonds in it.  They are so good.........so I use those instead of raw almonds.  But raw almonds are awesome too!  The bottom right is coconut- it's totally optional.  If you look back up at the post-it, there is nary a shred of coconut listed, but I threw it in to see what would happen.  Not much- the cocoa and cinnamon over-ruled it.  Oh well.


Everyone needs a good heavy-duty spatula!!

You know what you DON'T see?  Raisins!

I love raisins.  My first batch of granola had raisins in it.  But.........put raisins in the oven for 30 minutes and they actually turn into little pieces of gravel and you will end up picking them ALL out of your granola.  Trust me.

Cinnamon Almonds--Chop 'em up!

Now- chop up them nuts!  You don't want big old hunks of nuts in your granola, so chop them up.  They don't have to be chopped into oblivion, just chunked up so they can mix with the oats, etc.

Raw Pecans--Chop some more!

Nuts actually chop up really easily and nicely.  Even the roasted cinnamon almonds.  And if you like walnuts, add those too.  I don't like walnuts and my sister is allergic, so I don't like to run the risk of setting her into anaphylatic shock.  I keep a walnut free house.

Mix the dry.
Once you've mixed all the dry stuff together so that everything is coated and the cinnamon and cocoa smell is making you hungry, add the honey and melted butter!  (Vegan??  Use coconut oil instead!)


Add the honey and mix some more
Really mix the honey in, so that it coats everything!  Add a little extra if you want to.  This isn't an exact science.  Recipes are like the Pirate Code- they're really just guidelines.  You can taste it too.  It's nummy.  You could probably add chocolate chips to this shindig too.  Or maybe cinnamon chips.


Put it on a baking sheet

Now that you have a gooey mass of deliciousness, dump it all on a baking sheet.  Then throw it in the oven at 315 degrees for about 25-30 minutes.  Be sure you reach in a stir it around every 8 minutes or so.  It ensures that everything will brown nice and evenly. 

NOM NOM NOM

When it's done, pull it out, and try it.  It should be wonderfully crunchy and tasty.  Once it cools off completely, put it in an airtight canister or container.  I don't know how long it keeps because we never have it around that long.  I've put it in yogurt (sometimes with bananas), mixed it into my oatmeal, had it straight with milk, eaten it dry for a snack, sprinkled it on ice cream.......the possibilities are endless.

If you try it and like it, let me know.  If you try it and add something new, let me know.  If you try it and it comes out wonky, tell me that too.   But don't say I didn't warn you about the raisins!!!

Friday, February 15, 2013

Lent and Shepherds' Pie

This week was the start of Lent, beginning on Wednesday with Ash Wednesday.  Everybody in my house went to Mass and received ashes and fielded questions the rest of the day about the "dirt" on our foreheads.  It's one of the days of the year when my Catholicism is displayed and I am very proud of that.
I was walking into the grocery store and trying to look nonchalant about taking a picture of myself.  :)


Lent is also the time when we give something up, whether it is a material or spiritual in nature.  The goal is to come closer to Christ by giving up those things which distract or tempt us.

I gave up chocolate and ice cream.  I know it sounds kind of silly, but really, it is a great weakness for me and to fend off the temptations literally handed to me is going to be a great challenge.  For instance, my catechumen gave me a box of chocolate covered strawberries for Valentine's Day yesterday.  She was so excited to present them to me and I hated to tell her that as much as I appreciated and admired the gesture, I couldn't eat any of them because of my chosen Lenten fast.  I ended up sharing them with the rest of our (small) parish, so already I am seeing the physical fruits of my decision.  My kiddo has decided that 1) he is going to go through all his books and give some away to other children and 2) we are going to say 10 Hail Mary's every night before bed.
 
There are moments that stand out as a parent and last night was one of them.  We snuggled on his bed to say our prayers and I brought out two rosaries and taught him how to count Hail Mary's on the beads as we prayed.  I think he may find his very own rosary in his Easter Basket this year.

Family rosaries, including two from the Vatican


The other aspect of Lent is the "black fast" which basically means that we don't eat meat on Fridays.  The "limited time only!" fish sandwiches at all the fast food places make their appearance about a week or two before Ash Wednesday and then disappear shortly after Easter Sunday.  So, during Lent, I will be sharing some of my favorite meatless recipes with you on Fridays.

I have a subscription to Vegetarian Times magazine and that's where this recipe comes from.  It is easy to make and so delicious, I hope you will try it.  The spice of the filling is balanced by the sweet cornbread topping.  And if you've never tried Greek Yogurt as a replacement for sour cream, this is your chance.  You won't be sorry!  As always, if I have any modification ideas or tips, I will put them in colored italics within the recipe. 

Cornbread and Pinto Bean Shepherd's Pie

2 14.5 ounce cans Pinto Beans, drained, but reserve 1.5 cups of the bean liquid
I like black beans, so I will substitute one can of black beans for one of the pinto beans
3 Tbs Tomato Paste
1 Tbs olive oil
1 large red onion, cut into 1/4 inch dice (2.5 cups), divided
2.5 Tbs chili powder
3 medium plum tomatoes, seeded and chopped (1.5 cups), divided
I use any tomatoes I have on hand, and never mind the seeding bit.  Tomato seeds never hurt anyone!
6 Tbs whole-grain cornbread and muffin mix
I use Jiffy cornbread mix!
1 1/3 cups plain nonfat Greek yogurt, divided
1 Large egg
1 Tbs water
1.5 Tbs sugar

1)  Place oven rack in top position, and preheat oven to 425.  Coat 9-inch pie dish with cooking spray.  I use my biggest, deepest pie dish or a casserole dish.  Whisk the reserved bean liquid with the tomato paste.  (I've used salsa instead of this combo and it was spicy, but delicious.  About 1 cup salsa and 1/2 cup of the bean juice.)

2)  Heat oil in a large skillet over medium-high heat.  Add 2 cups onion.  Cover, and cook 4 minutes, or until onions begin to soften, stirring occasionally.  Add chili powder, and stir 10 seconds to coat onions.  Stir in tomato paste mixture (or salsa mixture), 1 cup tomatoes, and then beans.  Bring to a simmer, stirring occasionally.  Reduce heat to low and simmer uncovered, 6 minutes, or until the flavors blend and the chili liquid thickens.  Season with salt and pepper, if desired.


This is in the pie plate, and you can see the black beans I added.  But doesn't it look good!!!???

3)  Meanwhile, combine the cornbread mix, 1/3 cup yogurt, egg, sugar and 1 Tbs water in medium bowl.  This will be really soupy, so that it can be poured on top of the bean concoction.  
The first time I made this, I thought it was too soupy, so I added more mix to it and I ended up with giant cornbread muffins on top of my beans instead of just a crust!  HA!


4)  Spread chili beans in prepared pie dish.  Pour cornbread batter over beans, spreading with back of spoon.  Bake 10 minutes, or until cornbread is set and golden.

Mixed the right way, it spreads out very nicely, thank you!


5)  Meanwhile, finely chop remaining 1/2 cup onion.  Place in small bowl and mix in remaining 1/2 cup tomatoes, and season with salt and pepper.  (This may not seem like much, but it really makes the dish!)

6)  Divide shepherd's pie among shallow bowls.  Serve with tomato salsa and remaining yogurt.   

NOM NOM NOM!

Tuesday, February 5, 2013

Shrimp Soup with Chilli Tortilla Strips


 Oh, the irony.  Just a few posts ago, I was telling you how much I didn't like soup- that I like Chowdah.  And yet, I'm about to tell you about this delicious Shrimp Soup that I made recently.  I was dubious at first.  My Mom found the recipe- she LOVES soup.  She hands it to me and says "Doesn't this look good?"  I was kind of "meh" about the whole thing.  (again- not typically a soup person.)  But she is my Mom, so of course I made it..........

................and you know what...............
Pepe the King Prawn knows what's up.
Exactly.  It was light, but filling and the lime juice and cilantro gave a lovely accent to it that I did not expect.  This soup was light enough that it could be a summer soup.  And the homemade chilli tortilla chips- wow.  Way better and easier than expected.  

Oil, sprinkle, slice, bake.....!  (I bet they would be good if you sprinkled them with a little lime juice too.....)


First, let me point out that the recipe calls for a Pablano pepper.  I'm no connoisseur of peppers.  I know they come in hot and not hot, green and red and yellow and orange (my favorite), and that if you get pepper juice on your fingers, DO NOT touch your face.  (That one time was ALL it took......)  Standing in front of the pepper selection at the grocery store was a touch overwhelming.  There must have been 20 different varieties, not counting the standard bell peppers.  To make things more overwhelming, they did not have a Pablano pepper.

*moment of well there goes THAT plan*

I do carry one of those smart phone things that keep you connected to the world 24/7/365 and I was able to Google search pepper substitutions, and happily found the Cook's Thesaurus.  I ended up using an Anaheim pepper, which turned out to be pretty mild.  If you want to give your soup a little kick, I would add a Serrano pepper too.  I also threw in a handful of frozen bell pepper strips that I happened to have. 

It smells so good!   The red and yellow are bell peppers.

 As for the shrimp, I used frozen shrimp.  YUP!  The stuff in the seafood case that you buy "fresh" is actually the same thing......except it has already been thawed out and is more expensive.  Get the peeled and deveined UNCOOKED shrimp.  Don't get the cute little pink already-been-cooked cocktail shrimp that you dip in sauce.  Get the uncooked ones- they cook really fast and they won't get chewy.  I know, I know- they are all grey and icky looking, but they will turn pink- I promise!  And don't worry if they have tails- you can pluck them off as you eat. 

And remember.......cilantro (which is key- don't leave it out).....cilantro is not placed with the herbs typically.  Instead, it's over in the loose leafy green stuff and sold in bunches.  

I am a sucker for wooden spoons.  I always cook/ bake/ mix/ stir with a wooden spoon.

Once the soup is all cooked and lovely, ladle it out and top with a little bit of fresh Avocado and some of your tasty baked tortilla strips.  I can pretty much guarantee you will go back for seconds and if you have a couple friends over, you may not have to worry about leftovers at all!

Nom Nom Nom

Shrimp Soup with Chilli Tortilla Strips
(It takes about 45 minutes, start to finish)

1 large poblano pepper, seeded and chopped (about 1 cup)
I added a handful of bell pepper too, mainly for color.
1 medium onion, chopped (1/2 cup)
2 cloves garlic, minced
1 Tbsp Olive Oil
1 qt. chicken broth
1/4 tsp salt
1/4 tsp crushed red pepper
1 12 ounce package frozen shrimp (peeled and deveined- not cooked!)
(If you got a BIG bag of shrimp, no big deal- just freeze whatever is left over for the next shrimp dish you make!)
1 cup frozen corn
1 15 ounce can cannellini beans, rinsed and drained
1/4 cup snipped FRESH cilantro
2 Tbsp Lime Juice

1 small avocado, halved, seeded (this is to put on top when you serve it)

2 8-9 inch flour tortillas
1 Tbsp olive oil
chilli powder

Soup

1)  In a 4-5 quart Dutch oven cook poblano pepper, onion, and garlic in hot oil until just tender.  Add broth, salt, and crushed red pepper.  Bring to boiling.  Add frozen shrimp, corn, and drained beans; return to boiling.

2) Simmer, unocvoered, for about 2 minutes or until shrimp are pink and pretty (they called it "opaque").  Stir in cilantro and lime juice.  Serve in shallow bowls with avocado and tortilla strips.

Chilli Tortilla Strips

1)  Preheat oven to 350 degrees.
2)  Bring one side of the tortillas with the oil and sprinkle with chilli powder.  (They say 1/2 tsp, but I say use your own judgement as to how spicy you want them.)
3)  Using a pizza wheel slicer thing, cut into strips (see my picture way above).
4)  Place in a single layer on a large baking sheet.  Bake 12-15 minutes or until crisp.
5)  Don't burn your tongue by trying to eat one the second you pull the pan out of the oven.

Enjoy and let me know what you think in the comments below! 

Sunday, January 20, 2013

Not Your Average Chicken Stew

I'm not really a stew person.  Meat, potatoes, veggies.....all sitting together in the same broth........getting mushy.  Not my thing.

I do love a good chowder though.  No, I lied.  I love a good Chowdah.  Because if you say the "er" at the end, then it's not authentic.  Sorry- it's true.  I may live below the Mason-Dixon Line now, but I grew up a Yankee.

I have a pretty dang awesome cousin who, like me, grew up North, but now lives South.  I got to visit her recently (YAY!) and while I was at her (fantastic) house, I flipped through a cookbook she had.  It is very rare that I will find a cookbook that I like some of the recipes in.  I never find one where I like all the recipes, but here it was.  The most wonderful cookbook I have ever beheld.  Dishing Up Maine: 165 Recipes That Capture Authentic Down East Flavors by Brooke Dojny. 

As soon as I got back home, I ordered a copy on Amazon.  (You can get your own copy here.)  As soon as it arrived at my door, I picked out my first recipe.  Shaker Chicken Stew With Scallion Dumplings on page 158.  The name Shaker refers to the Sabbathday Lake Shaker Community.  (Definitely try their dried herbs......they are unbelievable.)

Like I said, I'm not typically a stew person, but my Mom is and this one sounded really good.  It is a little more complex, because you actually cook the chicken in broth to make the stock, but it is definitely worth the work.  Before I added the dumplings, it made a really wonderful chicken soup. 
I tossed in some of the extra sliced up scallions for color.......

Before the Dumplings.......

After I made the dumplings and added them, the stew really claimed its character.....and my heart.  It went from a plain old chicken soup to a lovely, creamy (and hearty) stew.  It will definitely be a favorite recipe of mine for years to come. 

Hearty Heavliness........in a soup pot
Without further adieu, I give you the recipe.  (Although don't bank on me giving away ALL the recipes from this cookbook........just try this one and know that the book is definitely worth buying.)

Shaker Chicken Stew with Scallion Dumplings

Chicken Stew:

  • 5 cups chicken broth
  • 3.5 pounds bone-in chicken thighs, excess fat removed
  • 1 medium onion, thinly sliced
  • 2 celery ribs, thinly sliced
  • 1 large bay leaf, broken in half
  • 2 tsp dried thyme
  • 2.5 cups baby carrots (I did these in 1/2 inch slices)
  • salt and pepper 
To make the chicken stew, bring the broth to a boil in a large soup pot or Dutch oven.  Add the chicken, onion, celery, bay leaf, and thyme.  Reduce the heat to medium-low and simmer, covered, until the chicken is about three-quarters cooked, 15 to 20 minutes.  Add the carrots and continue to cook until the chicken is no longer pink, about 10 minutes longer.  Remove from the heat

Remove the chicken to a plate and, when cool enough to handle, strip off the skin, remove the meat from the bones, and cut into 2 inch chunks.  Return the chicken meat to the broth and season with salt and pepper to taste.

Scallion Dumplings:

  • 1.5 cups all purpose flour
  • 1.5 tsp baking powder
  • 1/2 tsp salt
  • 2 tablespoons minced scallions or chives
  • 3 tablespoons chilled solid vegetable shortening, cut into five pieces
  • 1/2 cup (plus 1-2 tablespoons) milk
To make the scallion dumplings, whisk together the flour, baking powder, and salt.  Stir in the scallions.  Work the shortening into the flour mixture, using your fingertips or a fork, until most of the pieces are about the size of small peas.  Add 1/2 cup milk and stir with a fork until the dough comes together in a sticky mass.  If the mixture seems dry, add some or all of the remaining 1-2 tablespoons of milk.  (They really do mean sticky....)

Return the stew to a simmer.  Dip a tablespoon into the simmering liquid, scoop out a rounded spoonful of dumpling dough, and drop it into the simmering stew.  Repeat with the remaining dough, forming 12-14 dumplings.  Cover the pot and simmer over low heat until the dumplings look shiny on top and are firm to the touch, about 15 minutes.

ENJOY!!!!